Mechanical keyboards are built to last—and that’s exactly why they deserve proper care. The tactile feedback, precise actuation, and robust switch design are what make them so satisfying to use. But over time, even the best mechanical keyboard will collect dust, crumbs, oils, and residue that can affect both feel and reliability. Keys may start to feel inconsistent, switches can become sticky, and overall typing comfort declines.
Cleaning a mechanical keyboard isn’t just about aesthetics. It’s preventative maintenance that protects your investment and ensures consistent performance. Done correctly, it’s straightforward. Done carelessly, it can damage switches or shorten the keyboard’s lifespan. This guide walks you through how to clean your keyboard properly—while highlighting the trade-offs, common mistakes, and practical tips that matter in real-world use.
Why Mechanical Keyboards Require a Different Approach
Mechanical keyboards are fundamentally different from membrane keyboards. Each key has its own individual mechanical switch with moving parts, springs, and electrical contacts. These components are designed for precision, not exposure to moisture or harsh chemicals.
That means cleaning isn’t just about wiping the surface. You’re working around sensitive hardware that can be affected by:
- Moisture intrusion – Even small amounts of liquid can seep into switches and cause failure.
- Debris buildup – Dust and crumbs can interfere with switch movement.
- Improper tools – Rough handling or incorrect tools can damage keycaps or switch stems.
The goal is simple: remove dirt without introducing risk. That balance is what separates a safe cleaning routine from one that leads to expensive repairs.
A Practical Step-by-Step Cleaning Process
If you want consistent results, follow a structured process instead of improvising. This approach works for most mechanical keyboards, whether you’re using them for coding, gaming, or writing.
- Unplug and Power Down
Always disconnect the keyboard. If it’s wireless, turn it off and remove batteries if possible. This avoids short circuits and prevents accidental key presses during cleaning. - Remove Keycaps Carefully
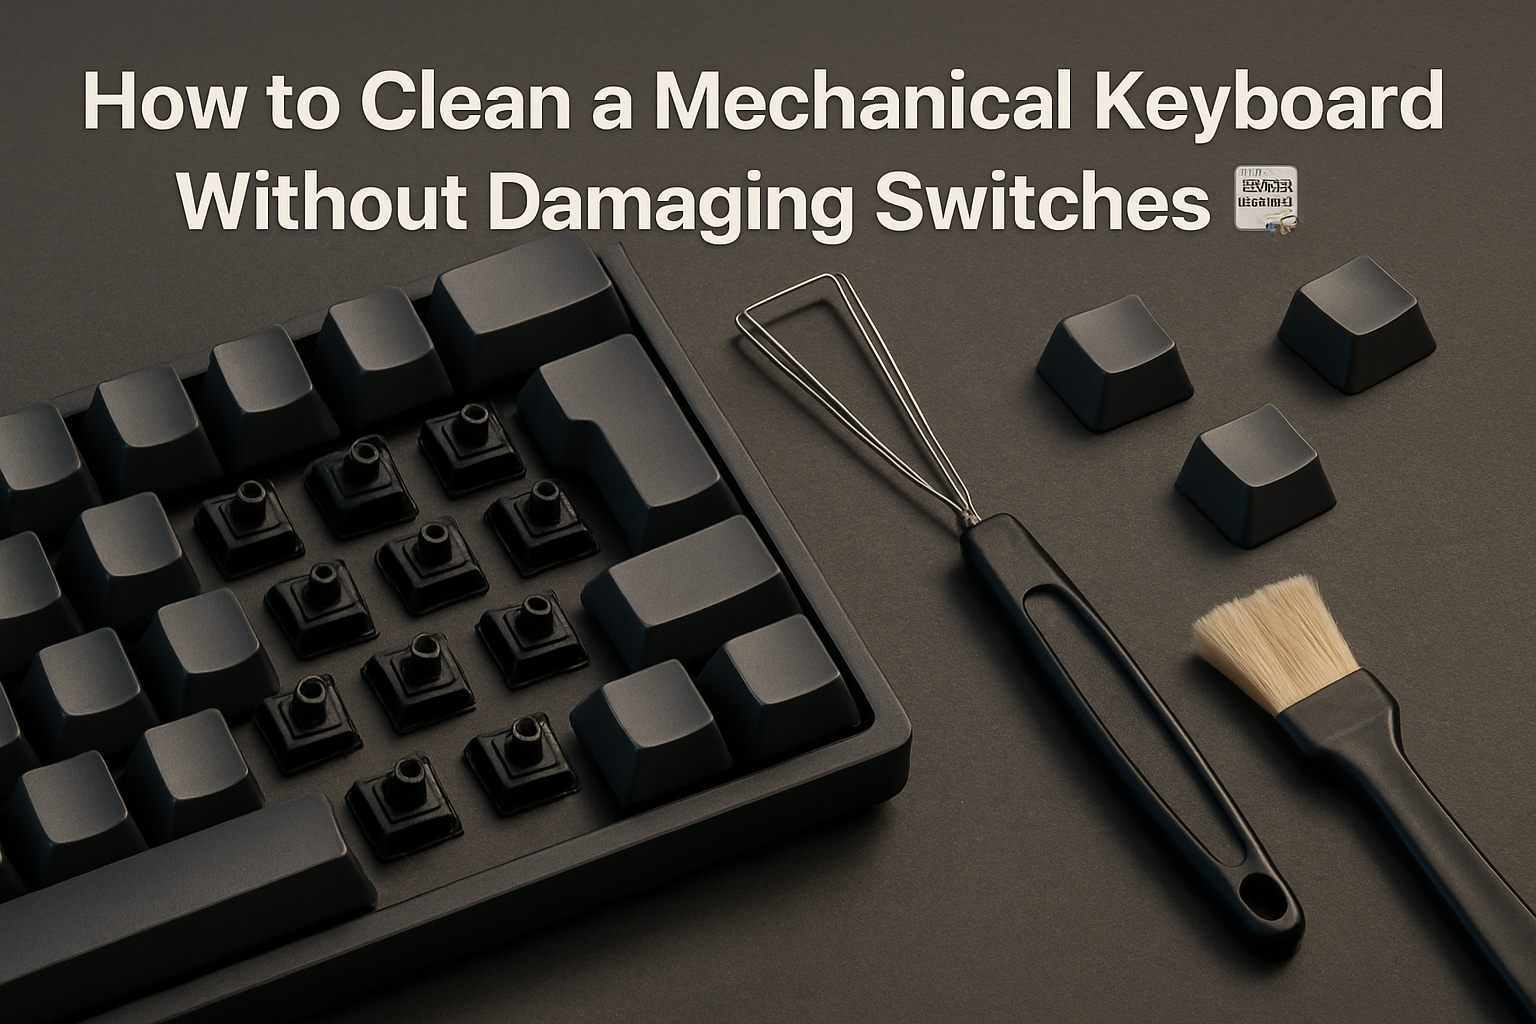
Use a proper keycap puller—preferably a wire-style puller—to avoid scratching or cracking the caps. Pull straight up with even pressure. Avoid twisting, especially on larger keys like the spacebar, which may have stabilizers. - Clean the Keycaps Thoroughly
Place the keycaps in a bowl of warm water with mild dish soap. Let them soak for about 30 minutes. Use a soft brush to remove stubborn grime, then rinse and lay them out to dry completely.
Tip: Don’t rush drying. Trapped moisture inside keycaps can cause issues later. - Remove Loose Debris from the Keyboard Base
Turn the keyboard upside down and gently tap it to dislodge crumbs. Follow up with compressed air to blow out dust between switches. Keep the can upright and use short bursts to avoid moisture from the propellant. - Wipe the Surface with Care
Use a microfiber cloth lightly dampened with isopropyl alcohol (70% or higher). Wipe around the switches and plate. Never pour or spray liquid directly onto the keyboard. - Address Sticky or Problematic Switches
If a switch feels sticky, use a small amount of isopropyl alcohol applied with a cotton swab or precision brush. This should be done sparingly. Overdoing it can push liquid into the switch housing. - Dry Completely Before Reassembly
This step is critical. Let everything dry thoroughly—keycaps and keyboard base—before putting the keyboard back together. Even slight moisture can cause long-term damage. - Reinstall Keycaps Thoughtfully
Press keycaps back into place evenly. Double-check alignment, especially for larger stabilized keys.
Tools, Products, and What Actually Matters
You don’t need a professional workshop to clean your keyboard, but using the right tools makes the process safer and easier. Here’s what’s worth having:
| Tool | Why It Matters | What to Avoid |
|---|---|---|
| Keycap Puller | Prevents damage when removing caps | Using fingers or metal tools |
| Compressed Air | Removes dust from tight spaces | Shaking the keyboard aggressively |
| Microfiber Cloth | Gentle on surfaces | Paper towels that leave residue |
| Isopropyl Alcohol | Evaporates quickly, safe for electronics | Household cleaners or water |
The biggest mistake people make is overcomplicating the process—or worse, using the wrong products. Strong cleaners might seem effective, but they can corrode components or damage keycap legends.
Real-World Example: Heavy Daily Use
Consider a developer who spends 8–10 hours a day typing. Over time, their keyboard accumulates oils from fingers, dust from the environment, and the occasional coffee spill. Initially, the changes are subtle: a slightly sticky spacebar, a less responsive Enter key.
After a proper cleaning session—removing keycaps, soaking them, clearing debris, and wiping down the board—the difference becomes immediately noticeable. Key presses feel consistent again, and typing errors caused by missed inputs disappear.
This isn’t about perfection—it’s about maintaining performance. For anyone who relies on their keyboard daily, even small improvements in consistency can have a real impact on productivity.
Common Mistakes That Can Ruin Your Keyboard
Many users damage their keyboards not from neglect, but from overzealous cleaning. Here are the pitfalls to avoid:
- Using too much liquid – Even isopropyl alcohol should be used sparingly.
- Skipping drying time – Reassembling too early can trap moisture.
- Pulling keycaps incorrectly – Twisting can break stems or stabilizers.
- Opening switches without experience – Internal components are small and fragile.
- Using household cleaning sprays – These often leave residue or cause corrosion.
A careful, minimal approach is almost always better than an aggressive deep clean.
Maintenance Habits That Reduce Cleaning Effort
Cleaning doesn’t have to be a major task if you build simple habits into your routine. Prevention is easier than deep cleaning.
- Keep food and drinks away – Spills and crumbs are the biggest contributors to buildup.
- Use a dust cover – Especially useful if your workspace collects dust quickly.
- Do quick monthly cleanups – A blast of compressed air goes a long way.
- Wash hands before long sessions – Reduces oil transfer to keycaps.
These small steps can extend the time between deep cleaning sessions significantly.
Recommended Further Reading
- How to Compare Keyboard Switches for Work, Gaming, and Writing ⌨️
- Best Mechanical Keyboards Under $150 for Developers in 2026 ⌨️
- Mechanical vs Low-Profile Keyboards for Software Developers: Which Typing Experience Wins? ⌨️
Practical takeaways
Cleaning a mechanical keyboard isn’t about achieving a spotless look—it’s about preserving performance. The best approach is one that fits your actual usage. If you type daily, schedule light maintenance regularly and plan deeper cleaning a few times a year. Consistency matters more than intensity.
Common mistakes to avoid
Don’t get distracted by trends, elaborate cleaning kits, or unnecessary disassembly. Focus on what keeps your keyboard functional and comfortable over time.
- Check workflow fit
- Check compatibility with cleaning tools
- Check comfort and long-term usability
If you rely on your mechanical keyboard every day, regular and careful cleaning is one of the simplest ways to protect your investment. Treat it like a precision tool—not just a peripheral—and it will reward you with years of consistent, satisfying performance.